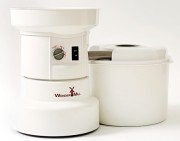
I received a Wondermill Grain Mill to test it in my own kitchen and participate in the Grain Mill Wagon Challenge. This is a compensated post and contains affiliate links. Views and opinions expressed are wholly my own.
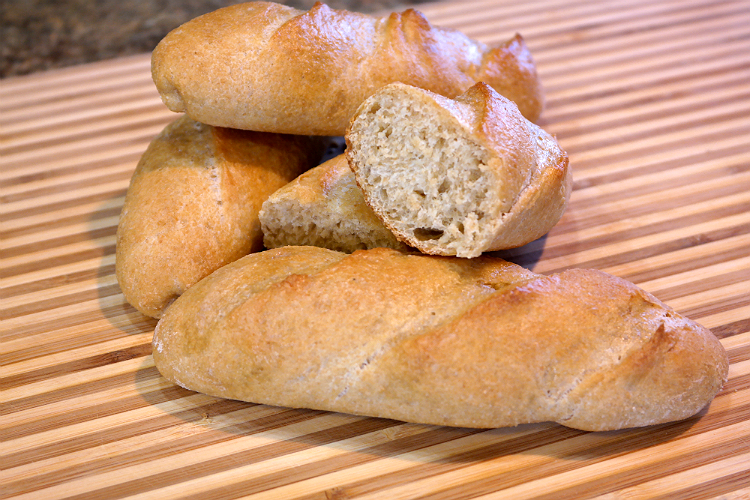
These delicious mini baguettes have a gorgeous, crispy crust and tender, soft insides. The smaller size makes them perfect for snacking and sandwiches, baked “boats” of all varieties or little “french bread” pizzas, when split in half.
I’m always looking for new ways to sneak whole grains into my “white bread lovin'” family — specifically my husband and my 12-year-old daughter. Those two are hard to convert; so, I have to compromise AND be a little more crafty to include nutritious whole grains in their food. This recipe is a good example and what I call a “half and half”, in my recipe box. When a recipe we love calls for all-purpose flour, I substitute half the amount with hard white whole wheat. The lighter color and texture, makes it literally unnoticeable to my finicky bread eaters and the flavor is fabulous, so I am winning them over one mini-baguette at a time. 🙂
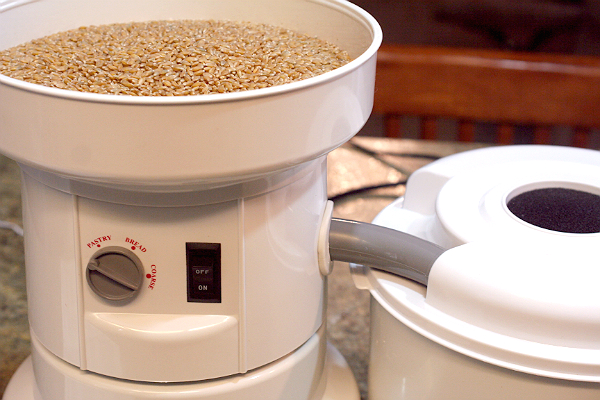
Grinding organic hard white wheat to make flour for these yummy baguettes. In only two or three minutes, I have all the fresh flour that I need! How simple is that!
My Wondermill Grain Mill makes it possible, to substitute a variety of grains in our old recipes, since I control the fineness of the grind and the type of grain I’m going to use to make my flour. I have milled everything from dried field corn to sorghum, barley or rye. I’ve used millet, teff, oats, many varieties of wheat, both brown and white rice, quinoa and amaranth in my baking, now that I can grind the flours myself. The fact that many of them are gluten-free has provided me with exciting opportunities to develop recipes for family members who are gluten-intolerant. I am thrilled with all the options that owning a Wondermill has afforded me and I will honestly never go back to buying whole grain flours, commercially. When I can choose what are, often, organic, non-GMO whole grains to use in my family’s food, why would I ever do anything else? I’m “all in” and once I fully convert my two “half and half” hold outs, we’ll be a 100% whole grain family, thanks to Wondermill!
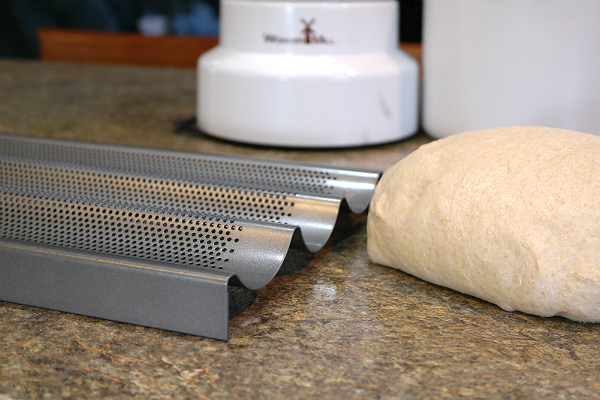
A couple quick notes about this recipe. First off, do NOT be intimidated by all the steps. I wanted to break this down so someone who has never baked bread, before, would be able to “see” the process. It took much longer to photograph and write this post than it will take you to make this simple recipe. Once you have mastered this, you will wonder why you haven’t always been baking bread. Secondly, artisan breads like boules, baguettes and battards have that wonderful chewy, crisp crust. A couple of different things contribute to that. One is baking with steam, which you can do and I will tell you about in the recipe. The second is the choice of pan for baking. Ideally, we would all have baking stones to use. I do have stones, but assuming that many of you don’t, I wanted to show you the baguette pans I love and specifically use for baguettes and French or Italian rolls. These pans are shaped to cradle each loaf without it rising into the next one and are perforated with tiny holes that allow steam to reach every surface of the rolls, even the bottoms. This helps to give a uniformly crisp crust, all the way around the baguettes. Barring both the stone or the baguette pan options, you CAN bake these on a regular baking sheet. The crust results will just be different than traditional baguettes – softer. Flavor-wise, they will still be perfect! Okay, now that you understand the pans, lets make some delicious baguettes!

- 283 grams unbleached all-purpose flour
- 284 grams freshly milled, hard white wheat flour
- 11 grams salt
- 4 grams instant yeast
- 13.5 ounces of warm water (about 110 degrees) (You may need a little more or less depending on the humidity where you are.)
- Weigh out and combine flours in a large mixing bowl.
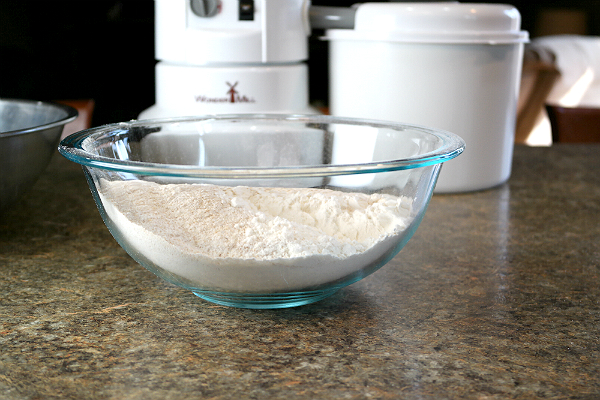
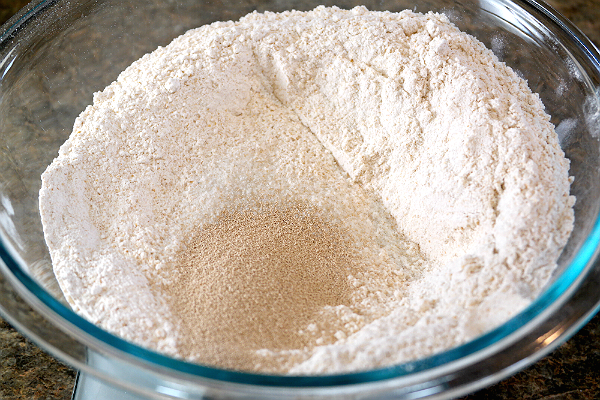
- Add yeast and salt and stir to combine.
- Add water all at once, so all the flour is quickly hydrated.
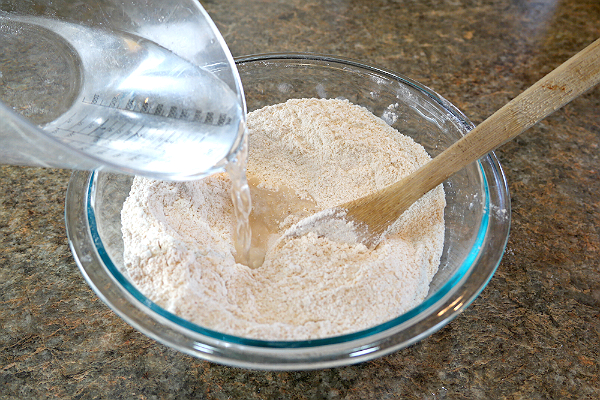
- Stir until no dry flour mixture is left and the dough begins to take on a "shaggy" ball appearance. The dough will be very wet and sticky.
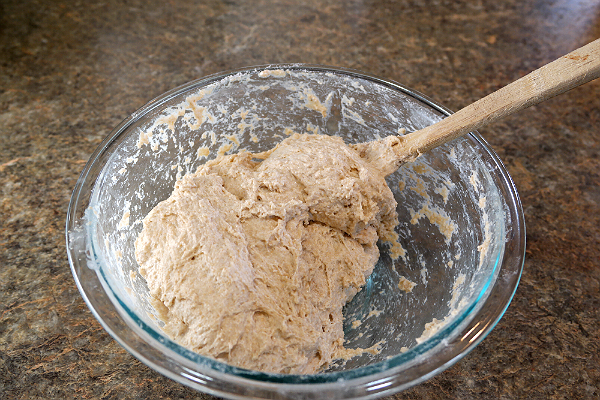
- Pour a teaspoon or two of olive or vegetable oil onto the counter and spread it around to grease your work area. This will keep your dough nice and moist, by preventing excess flour from being worked into it. I promise, over the course of the next several steps, your dough will tighten up and become less sticky.
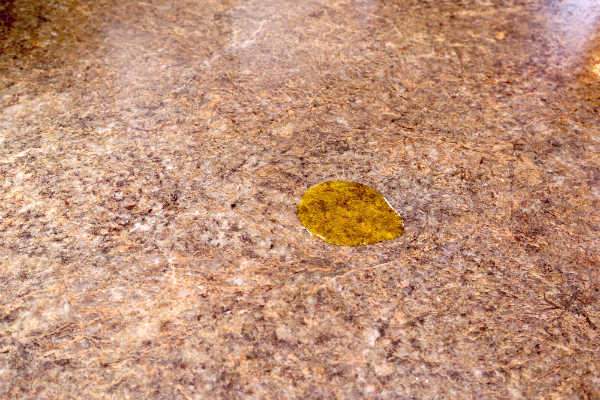
- Pour the dough out onto your greased work surface. Give the dough about five minutes to rest.
- After the resting time, you will begin the first of four "stretch and fold" workouts with your dough. This process will be repeated four times, at 20 minute intervals, until your dough is ready to shape. This technique allows you to work with super moist dough, gives the yeast time to ferment and develop great flavor and prevents breaking down all the lovely carbon dioxide bubbles you are forming in your bread dough during the resting periods, giving your bread fabulous texture.
- Moisten your hands with plain water, before handling the dough. Did you know that wet won't stick to wet? Because you are working with such a super-hydrated dough, keeping your hands moist will make it easy for you to work with the dough, without it sticking to your hands.
- For the first "stretch and fold", gently grasp the top end of your dough ball and stretch it out and up.
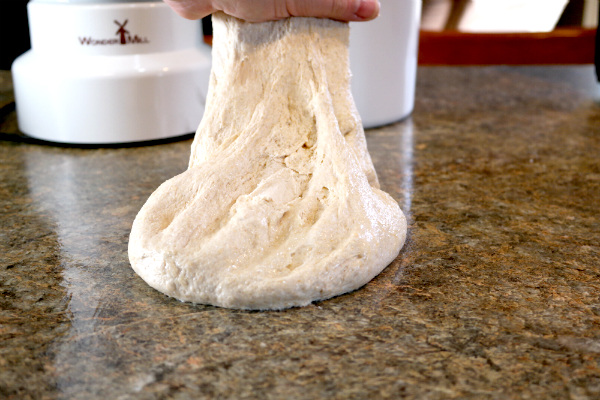
- Fold that flap of dough over the front of your dough ball and rotate the whole ball one quarter turn clockwise. Stretch from the top, once again, folding the flap over the front of the ball. Repeat the stretch and fold two more times, (making a quarter turn with each), until the dough ball has been rotated a full turn. If you need a little more olive oil on the counter, through this process, to prevent sticking, go ahead and add some.
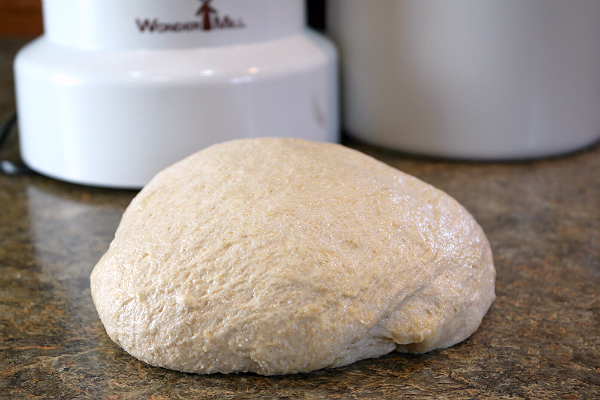
- After completing this first full "stretch and fold" round, your dough will still feel pretty sticky, but already be smoother and "bouncier" than before you poured it from the bowl. Your stretching and folding will help the gluten strands to form that will develop great texture in your bread.
- You could spray plastic wrap and drape it over the dough, if you prefer. I simply set a large mixing bowl over the top. Allow the dough to rest for 20 minutes.

- After the first 20 minute rest, moisten your hands and repeat all four rotations of the "stretch and fold" technique, described, above. After the fourth rotation, cover the dough and allow to rest for 20 minutes.
- Now, it's time for your third "stretch and fold" session. Make sure to turn the dough ¼ turn after each fold. Cover the dough and let it rest for 20 minutes.
- Here you go! Fourth and final "stretch and fold".
- Now, cover and let the dough rest for a full 30 minutes.
- On the bottom rack of your oven, place an empty baking sheet, with sides, or a 9x13 cake pan. Place it as far to one side of the oven as you can get it, so it is resting against the side wall on that side.
- If you will be baking your bread on a baking stone, place the stone on the center rack, so that it can preheat with the oven.
- Preheat the oven to 500 degrees.
- After this final rest, your dough will be puffed up and wonderful, flavorful from fermentation and ready to be shaped into mini baguettes. (Compare the photo after step 16, with this one. See the difference in the smooth surface tension of the dough, after all that good gluten developing you did?)
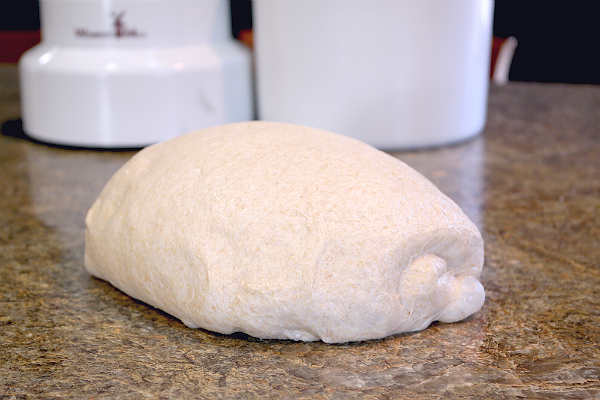
- To shape the baguettes, you will want a light dusting of flour on your counter.
- Using a bench knife, or sharp knife, cut the dough into 12 equal pieces. Mine weighed about 3.1 ounces, each.
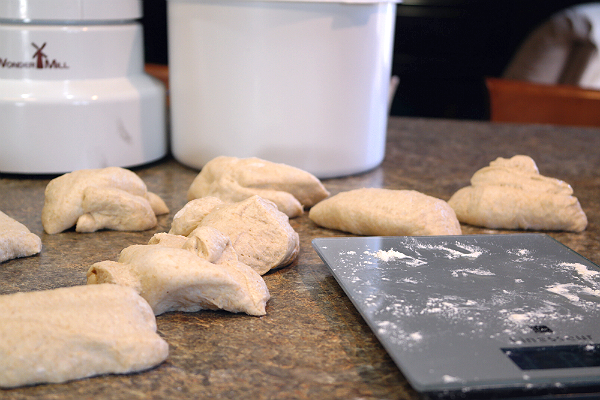
- Take one piece of dough and gently flatten and elongate it into a five- or six-inch-long rectangle, trying not to "de-gas" it, too much. Then use the "little finger" edge of your hand and compress a narrow ditch down the center of your rectangle.
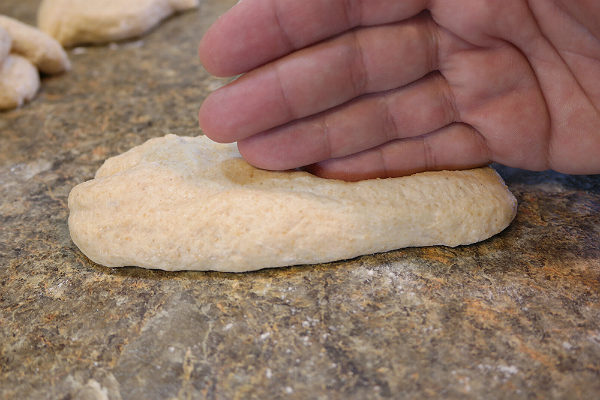
- When you're finished, your piece of dough will look like this.
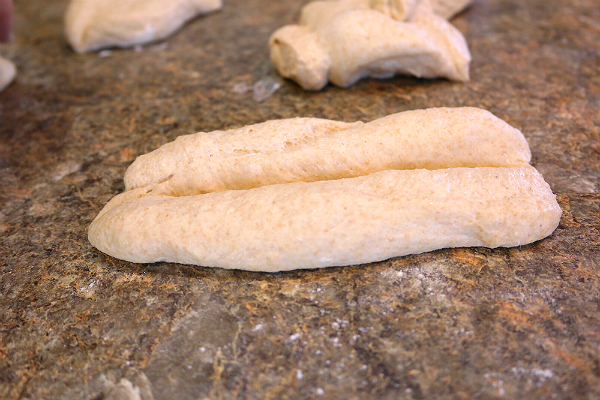
- Facing the dough, gently take the long edge of your dough (the one furthest away from you) and carefully press just the edge of it into the center indentation.
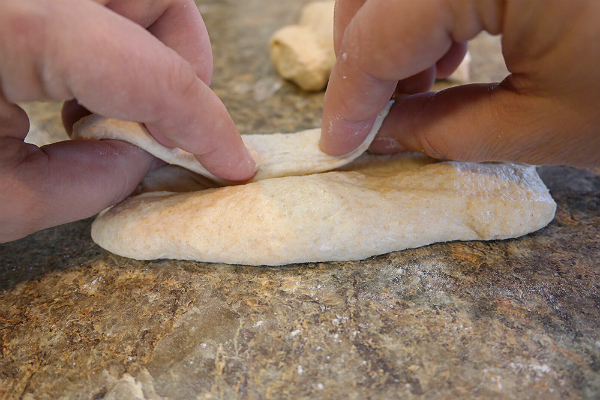
- Now, take the bottom edge of the dough and do the same thing. Fold the edge of it to the center, pressing it into the indentation.
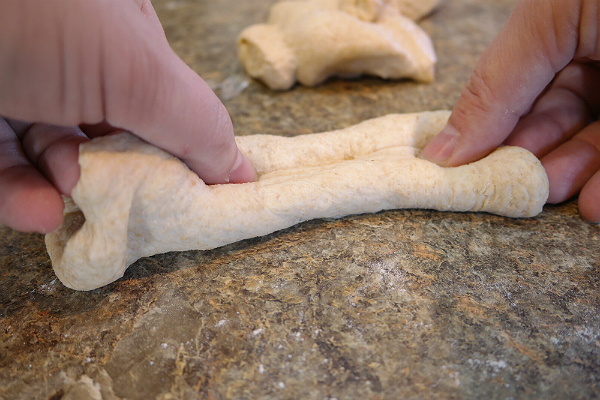
- Pinch the top edges, above the indentation closed, to form the basic roll.
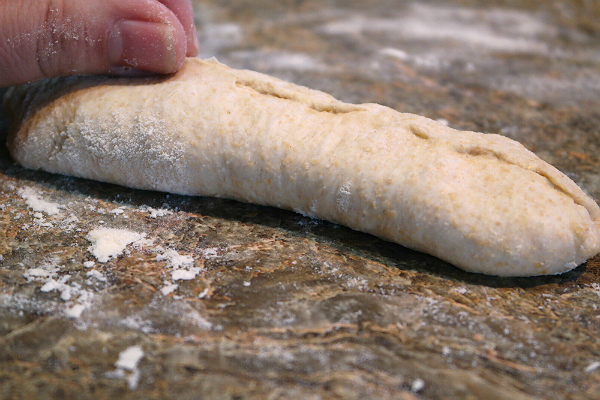
- Gently -- very, very gently -- with the lightest touch, roll the baguette back and forth on the counter in front of you, five or six times, with your hands on the outside edges of the roll. This will help to smooth out the seam and to create the traditional tapered shape.
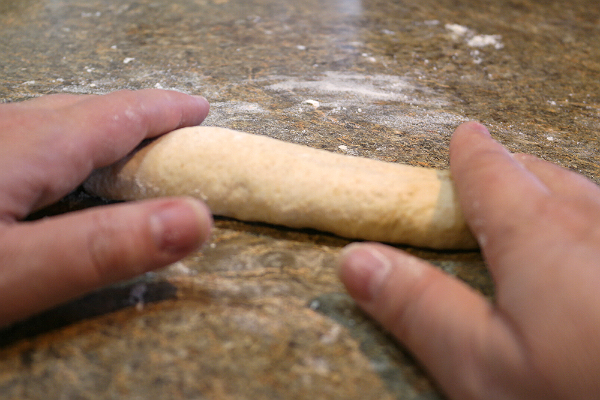
- Baguettes are usually slightly thicker in the middle, tapering to a point at each end.
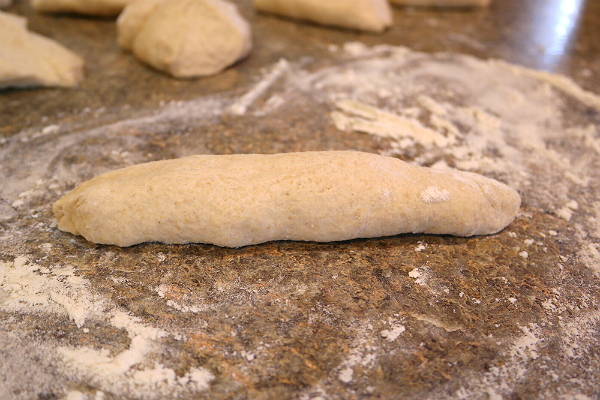
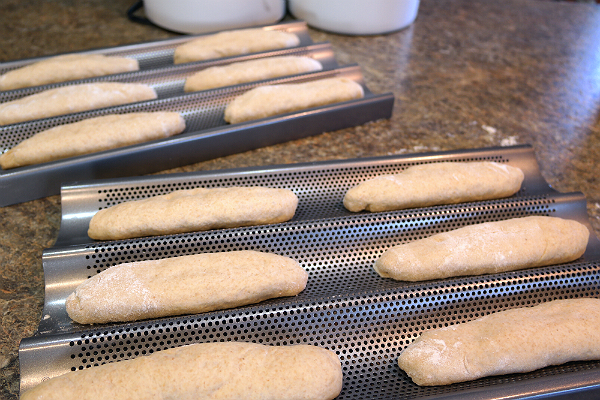
- Transfer the shaped dough to the back side of a baking tray covered in parchment paper (back side, because you will transfer the parchment to a baking stone when ready to bake) - OR - a baker's peel dusted with cornmeal (also for transferring to a stone) - OR - baguette pans, like I'm using. Ideally, you will bake these on a stone heated in your oven, or the baguette pan. (If you have none of those options a plain baking sheet can be substituted.) This will create the most traditional crust for your baguettes. If you don't have either one, you can certainly bake them on a regular baking sheet, realizing that the texture of the crust will be more like loaf-bread than baguette crust.
- Shape the remaining eleven rolls and place them on your chosen pan to rise.
- Spray a piece of plastic wrap and drape it over rolls, to keep them from drying out when they rise.
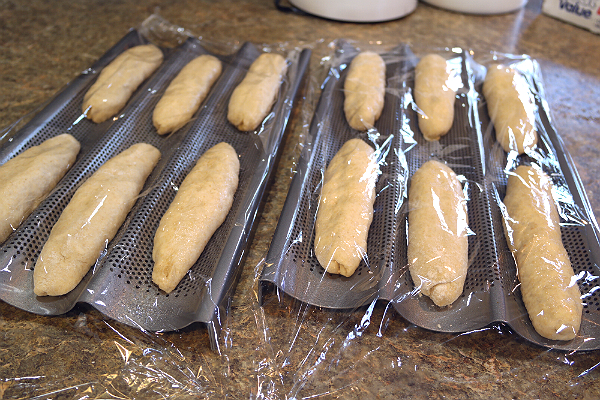
- Set your timer for 20 minutes. You want the baguettes to begin rising, but you need to catch them before they are fully doubled. If you wait too long, scoring them will cause them to deflate. After 20 minutes, if you feel like they still need a little more rising time, check them every 5 minutes. I wouldn't go much past 40, typically, for these small rolls. They should rise to about 1½ times their original size.
- Using a very sharp serrated knife, slash two or three cuts diagonally across the top of the baguettes. They may appear to fall slightly, for a moment, but don't panic, they will continue to rise and "bloom" in the oven, if you caught them before they doubled.
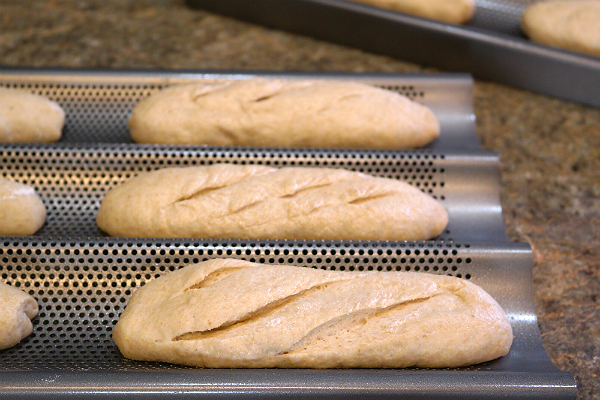
- If you are baking these on a stone, slide the parchment, with the risen baguettes, off the baking sheet (or off your peel) onto the pre-heated stone in your oven. If you are using baguette pans, as I have, place the pans on the center rack in your oven.
- Immediately after placing the bread in the oven, pour one cup of water into the baking pan you've had preheating in the oven. Protect your hand from the steam, by wearing an oven mitt or wrapping it with a towel. Close the oven door, immediately to trap the steam inside. This steam is what will help to form the delicious chewy, crispy, crackling crust on the outside of your baguettes, while the insides stay soft and tender. Baking these on a baking sheet is 100% possible. The crust, especially the bottoms, of your baguettes will just not have the same texture as when you use a preheated stone or the baguette pans that allow the steam to surround each roll on all sides. They WILL, however, taste absolutely delicious!
- Bake the rolls for 5 minutes and then reduce the temperature to 450 degrees.
- Continue baking another 10 - 15 minutes, until the rolls are golden brown on top and have reached an internal temperature of about 200 degrees.
- Remove the baguettes from the oven and allow to cool on a cooling rack, (if you can stand to wait). I like to brush the tops with a small amount of butter while they are still hot. That is optional, of course.
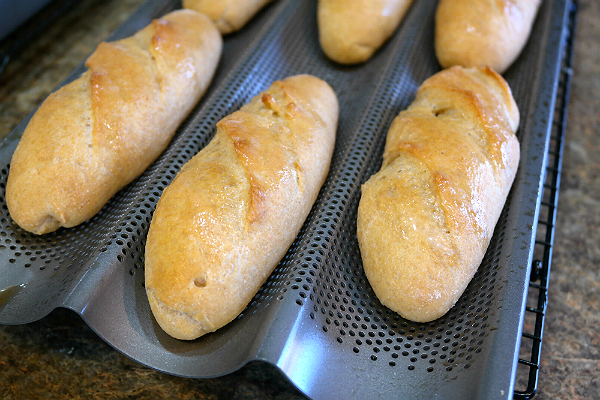
- Serve them plain, with fruit and cheese, sliced for sandwiches or mini french bread pizzas. You can hollow them out to use as "boats" for scrambled eggs, dips, or any other delicious stuffing you can think of.
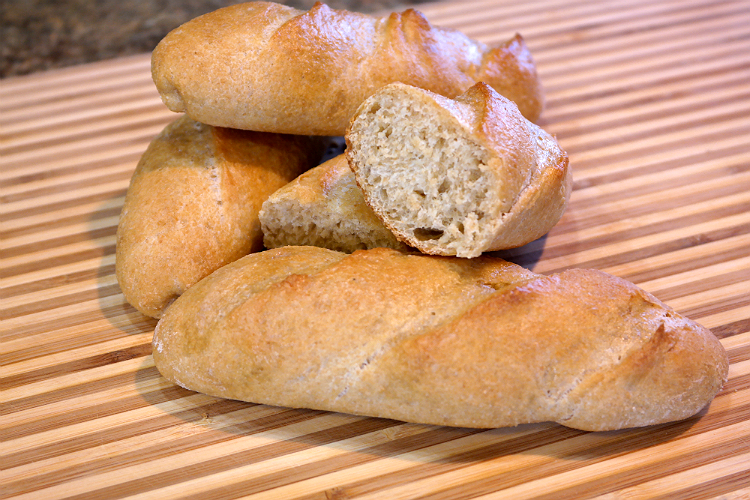
- Personally, I love them warm from the oven, with some good olive oil and a garlic or citrus vinegar.
- DELISH!






One Response to Mini Half and Half Baguettes