Let me start this post by saying that I am in love with my WonderMill Grain Mill. It has made such a difference in my kitchen. I have tried in the the past to make and keep up a sourdough starter, but to no avail. I am convinced that part of what made the difference this time around was using freshly milled grain.
Making and maintaining a sourdough starter is not difficult. In fact, it is quite simple to make and quite easy to maintain it. Like any living thing in your home, it will require some attention, but the benefits (health and taste-wise) you get from taking care of it far outweigh the work it takes.
The recipe for starting a sourdough starter couldn’t be simpler:

- Clean glass jar and a cloth to cover it
- Fresh-milled Flour
- Oxygen
- There are disagreements as to what ratio of flour to water you should use for sourdough. I used a ratio of 1.5 parts flour to 1 part water. Every time I fed the starter I used ¼ cup flour plus a half of a ¼ cup (technically ⅜ of a cup total) and then a ¼ cup of water. Mix thoroughly to incorporate oxygen.
- Continue feeding 1-3 three times a day. Starter should double in size between feedings.
- If it has trouble rising, pour out half of the starter and continue as normal.
- If no bubbles appear, start over, making sure to stir, stir, stir vigorously to incorporate oxygen.
I learned how to start a sourdough starter from reading Wardeh Harmon’s The Complete Idiot’s Guide to Fermenting Foods, a wonderful book that has recipes for all sorts of ferments from sourdough to kimchi to ketchup to natural sodas to yogurt and beyond. I HIGHLY recommend it for any kitchen. I use it all the time.
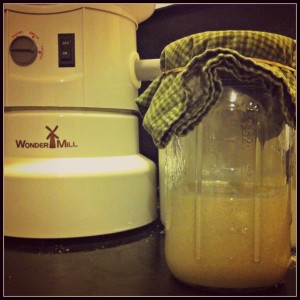 To start, place flour and water (3/8 cup flour and 1/4 cup water) in your clean glass jar (I used a pint jar and then transferred to a quart when the starter got too big). Stir, stir, stir to incorporate oxygen. Cover with a light cloth (securing with a rubber band if necessary). Leave in a warm place over night. The next morning add the same amount of water and flour again. Stir, stir, stir. Feed again at night before you go to bed.
The starter should double or triple in size between each feeding. The time it takes to grow depends on many factors– the temperature of your house, the humidity, the quantities of bacteria and yeast in the air, etc. If your starter seems to have issues rising, take out half of the starter and add more flour and water.
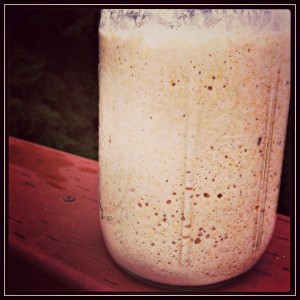 Eventually, where there was just water and flour you now have a happily, bubbly, fermented, mixture of flour, water and wild yeasts that looks something like the picture on the left.
To maintain your starter, you will need to continue feeding it the ratio of water/flour at least once daily. I find that my starter is happiest if I feed it two times a day, but sometimes I forget to feed it that regularly!
If you need to take a break from feeding it for a while simply put a tight lid on it and place it in the refrigerator. (Wouldn’t it be nice if we could do that with other things sometimes!) Remove it when you are ready to begin again, let it reach room temperature, and then feed it as normal.
This is a simple and basic lesson on how to start and maintain a sourdough starter. If you are wanting to know more techniques, there are wonderful books out there to help you which are written by people who have made it part of their life’s work to understand the ins and outs of sourdough. Here are a few I would recommend:
- The Complete Idiot’s Guide to Fermenting Foods
- Sourdough A to Z by GNOWFGLINS
- Classic Sourdoughs, Revised: A Home Baker’s Handbook
- Baking with Sourdough (Storey’s Country Wisdom Bulletin)
- Local Breads: Sourdough and Whole-Grain Recipes from Europe’s Best Artisan Bakers
Good luck and happy fermenting!










14 Responses to How to Make a Whole Wheat Sourdough Starter